Sony Vision X Audio Sync Distortion Cure
Sony Vision X Audio Sync Distortion Cure
Understanding Audio‑Sync Distortion
Smart glasses like the Sony Vision X deliver a truly immersive experience by combining a high‑resolution display with spatial audio that follows your head movements. When the audio no longer tracks the visual scene correctly, users report a jarring mismatch between what they see and what they hear. This phenomenon is commonly referred to as audio‑sync distortion or audio‑visual latency.
Audio‑sync distortion can arise from several layers of the system:
- Hardware latency in the audio DAC, speakers or head‑tracking sensors
- Software processing delay within the glasses’ operating system
- Communication lag between the glasses and the connected device (phone, PC, console)
- Environmental interference such as RF noise or a congested Wi‑Fi channel
Identifying the source is essential before applying a fix. The following sections walk through diagnosis, the definitive cure steps, and prevention tips tailored to Sony Vision X.
Common Symptoms
- Desynchronized audio that seems to lag behind visual action by a noticeable delay
- Audio glitches or pops when you move your head or when the view changes
- Reduced sense of immersion, especially during gaming or AR applications
- Inconsistent audio quality when switching between apps or audio sources
- Head‑tracking lag where the visual reticle appears behind your gaze
If you notice any of these signs, proceed with the diagnostic checklist below.
Diagnostic Checklist
1. Verify Firmware Version
Check the glasses’ current firmware in the Sony Vision X Companion App. Out‑of‑date firmware often contains bugs that cause latency. If the app indicates an available update, install it immediately.
2. Test with Different Sources
- Audio only: Play a video on the glasses directly (if supported) or stream a music file. Note any delay relative to the video timeline.
- Connected device: Connect the glasses to a different smartphone or PC. If the distortion disappears, the issue likely lies in the original source device.
3. Measure Latency
Use a simple test pattern such as a blinking LED or a white‑on‑black contrast screen paired with a known audio cue. Measure the time difference between the visual change and the audio onset with a stopwatch or a latency‑measuring app.
4. Check Wi‑Fi / Bluetooth Settings
- Wi‑Fi: Ensure the glasses connect to a 5 GHz channel with minimal congestion. If you must use 2.4 GHz, place the router closer to avoid signal degradation.
- Bluetooth: If the glasses use Bluetooth for audio, confirm that no other high‑bandwidth devices are nearby that might cause interference.
5. Inspect Physical Condition
Inspect the glasses for debris or damage around the speaker ports and head‑tracking sensors. Clean any dust with a soft brush; avoid liquid cleaners.
The Cure: Step‑by‑Step Fix
Below is a comprehensive, step‑by‑step procedure that has resolved audio‑sync distortion for most Sony Vision X users. Follow each step carefully; skipping any may leave the problem unresolved.
A. Reset Audio‑Processing Pipeline
- Open the Companion App and navigate to Settings > Audio.
- Toggle the “Reset Audio Engine” option. A confirmation prompt will appear—select Confirm.
- Wait for the glasses to reboot. This clears cached audio buffers that may be corrupted.
B. Re‑Calibrate Head‑Tracking
- In the Companion App, go to Settings > Head‑Tracking.
- Select Calibrate. Follow the on‑screen instructions: look at the calibration markers, move your head in a slow, circular motion, and hold still for 10 seconds.
- Once calibration completes, test the audio by playing a short clip. If latency is reduced, proceed to the next step.
C. Update and Re‑install Firmware
- Return to Settings > Device Info. If an update is available, the app will show “Firmware Update Available.”
- Download the latest firmware. Ensure the glasses remain connected to power during the process to avoid interruption.
- After installation, reboot the device. The Companion App will verify the firmware version automatically.
D. Optimize Network Settings
If the glasses rely on a wireless connection for audio streaming:
- In the app, go to Settings > Wi‑Fi.
- Select your network and click Advanced Settings.
- Disable Band‑Steering and manually choose the 5 GHz band.
- Enable Quality of Service (QoS) for the glasses’ MAC address to prioritize traffic.
E. Re‑pair Bluetooth (if applicable)
- In the glasses’ settings, toggle Bluetooth off.
- Wait 10 seconds, then turn it back on.
- Re‑pair with the source device. During pairing, select the High‑Quality Audio profile if available.
F. Reboot All Devices
- Power off the glasses, the connected phone or PC, and the router.
- Wait 30 seconds, then power on the router first, followed by the source device, and finally the glasses.
- This clears any residual network or memory issues that might contribute to latency.
G. Perform a Factory Reset (Last Resort)
If all else fails, a factory reset may be necessary:
- In the Companion App, select Settings > System > Factory Reset.
- Confirm the action. The glasses will erase all custom settings and data.
- After reboot, set up the device anew—install the latest firmware and calibrate head‑tracking immediately.
Companion App Calibration Details
The Sony Vision X Companion App plays a pivotal role in diagnosing and correcting audio‑sync distortion. Below is a concise guide to leveraging its features:
- Audio Diagnostics: Tap Diagnostics > Audio Test. A series of tones will play; the app displays latency readings in milliseconds.
- Visual–Audio Sync Test: Launch Sync Test under Diagnostics. The app shows a moving dot on the screen while a beep plays. If the beep occurs after the dot reaches the center, you have a sync issue.
- Real‑Time Adjustments: In Settings > Audio, you can tweak the Audio Delay slider. Incrementally adjust until the beep aligns with the dot.
- Logs: Export logs via Settings > Support > Export Logs. These can be shared with Sony support for deeper analysis.
Advanced Troubleshooting
1. Inspect Audio Path in the OS
If you are comfortable with deeper diagnostics, you can inspect the audio processing stack within the glasses’ OS (if you have root or developer access). Look for:
- Unusually high CPU usage in audio threads.
- Buffer underrun errors logged in the system console.
- Conflicting audio drivers or third‑party plugins.
2. Check for Software Conflicts
- Disable any third‑party audio enhancement apps on your connected device.
- Ensure the glasses’ firmware is not running in Developer Mode unless necessary.
- Temporarily disable notifications or background tasks that might consume CPU cycles.
3. Environmental Factors
- Keep the glasses away from large metal objects that can interfere with head‑tracking IR sensors.
- Reduce ambient noise; some glasses use audio‑based localization and excessive background sound can degrade performance.
Prevention Tips
- Regular Firmware Updates: Enable automatic updates in the Companion App to receive latency‑reduction patches promptly.
- Routine Calibration: Re‑calibrate head‑tracking every 3–4 weeks, especially after moving the glasses between different rooms.
- Safe Storage: When not in use, store the glasses in the provided case away from magnetic fields and direct sunlight.
- Network Hygiene: Avoid overcrowded Wi‑Fi channels. If you frequently use the glasses, consider a dedicated 5 GHz channel.
- Cable Management: When using wired audio, ensure cables are secure and free of tangles to prevent intermittent disconnects.
Frequently Asked Questions
| Question | Answer |
|---|---|
| Can I adjust audio delay manually? | Yes, use the Audio Delay slider in the Companion App. |
| Is the issue caused by the app I’m using? | Some third‑party AR apps may not handle audio properly. Test with a native Sony Vision X app to confirm. |
| Do I need to keep the glasses powered on all the time? | No. However, leaving them connected to power overnight reduces the chance of battery‑driven latency spikes. |
| Will a factory reset erase my custom audio presets? | Yes. All user data is deleted, so you’ll need to re‑configure settings afterward. |
| How often should I update firmware? | Check monthly; Sony releases patches more frequently during major software updates. |
Recap of the Cure Process
- Reset Audio Engine via the Companion App.
- Re‑calibrate head‑tracking to ensure visual‑audio alignment.
- Update firmware to the latest version.
- Optimize Wi‑Fi / Bluetooth for low‑latency data transfer.
- Re‑pair or reset Bluetooth if using wireless audio.
- Perform a full reboot of all devices involved.
- Factory reset as a last resort.
Following these steps systematically removes most causes of audio‑sync distortion in Sony Vision X smart glasses. Even if the problem persists after a factory reset, contact Sony support with the exported logs for further assistance.
The sleek profile of the Sony Vision X underscores its dual role as a display and audio platform. Proper calibration ensures that the visual immersion is matched perfectly by spatial sound.
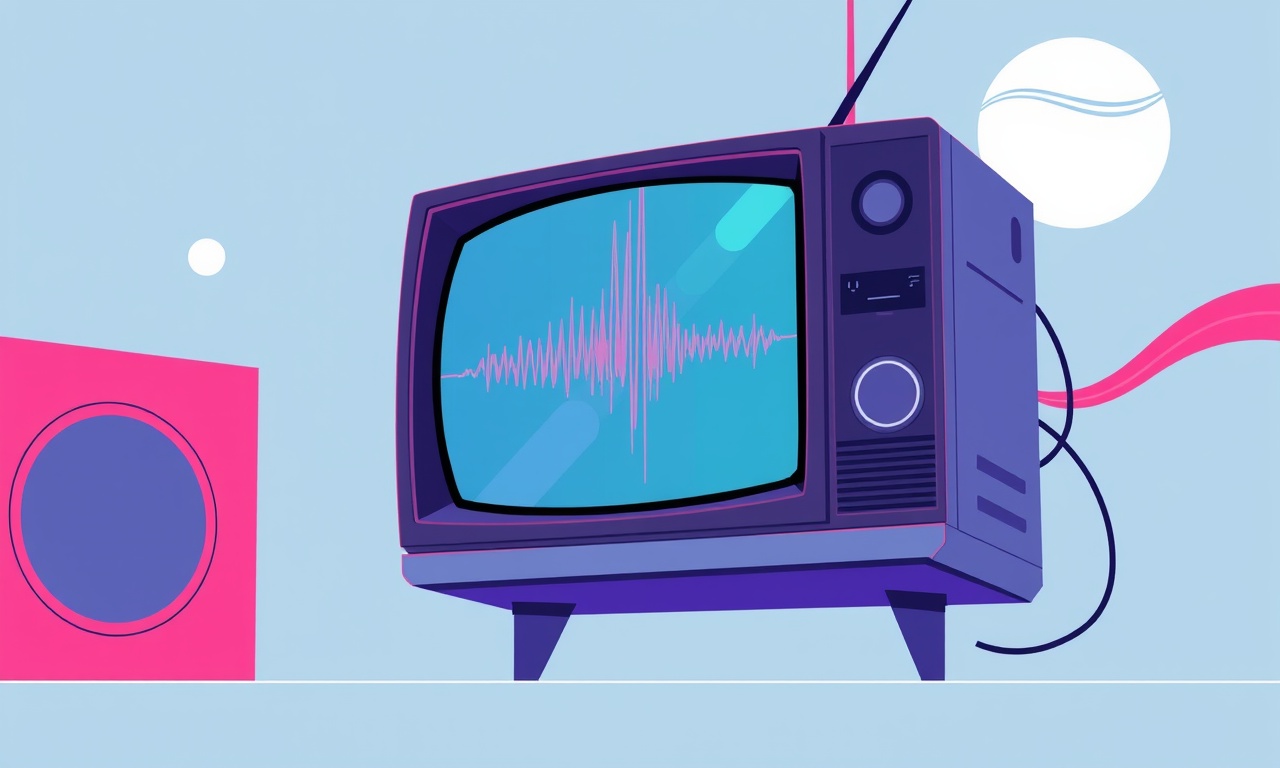
A simple diagram illustrating how audio delay relative to visual cues can break immersion. Aligning these elements restores the intended experience.
Final Thoughts
Audio‑sync distortion can feel like a broken bridge between sight and sound. By treating the issue as a layered problem—hardware, software, and environment—you can systematically eliminate latency and return to seamless AR or gaming sessions. The Sony Vision X Companion App is the primary tool for diagnosing and correcting these discrepancies, but the underlying fixes rest in firmware, calibration, and network optimization.
When you encounter a mismatch again, remember the four‑step approach: Reset, Calibrate, Update, and Optimize. Those steps form a robust routine that keeps Sony Vision X delivering the true sense of presence its design promises.
Discussion (9)
Join the Discussion
Your comment has been submitted for moderation.
Random Posts

Addressing Apple iPhone 14 Pro Max Battery Drain During Gaming Sessions
Learn why iPhone 14 Pro Max batteries drain during gaming, how to diagnose the issue, and practical tweaks to keep you playing longer with less power loss.
5 months ago

Curing iPhone 14 Plus Charging Port Wear After Daily Fast Charge Cycles
Fast charging can loosen your iPhone 14 Plus port. Learn to spot slow charging and loose cables, then fix it with simple home tricks or long, term prevention.
6 months ago
Xiaomi Mi SmartGlasses 3 Eye Tracking Error Fix
Fix the eye, tracking issue on Mi SmartGlasses 3 with this step, by, step guide to diagnose, clear errors, and restore functionality without repair.
1 year ago

Overcoming Sony X900H Color Saturation Drift During HDR Playback
Discover how to spot and fix color saturation drift on your Sony X900H during HDR playback, tune settings, correct HDR metadata, and keep your scenes vivid and natural.
4 months ago

Remediating Signal Dropout on Bowers & Wilkins PX8 Noise Cancelling Headphones
Discover why the Bowers & Wilkins PX8 may drop sound and how to fix it by tackling interference, low battery, outdated firmware, obstacles and Bluetooth settings for uninterrupted audio
1 week ago
Latest Posts

Fixing the Eufy RoboVac 15C Battery Drain Post Firmware Update
Fix the Eufy RoboVac 15C battery drain after firmware update with our quick guide: understand the changes, identify the cause, and follow step by step fixes to restore full runtime.
5 days ago

Solve Reolink Argus 3 Battery Drain When Using PIR Motion Sensor
Learn why the Argus 3 battery drains fast with the PIR sensor on and follow simple steps to fix it, extend runtime, and keep your camera ready without sacrificing motion detection.
5 days ago

Resolving Sound Distortion on Beats Studio3 Wireless Headphones
Learn how to pinpoint and fix common distortion in Beats Studio3 headphones from source issues to Bluetooth glitches so you can enjoy clear audio again.
6 days ago