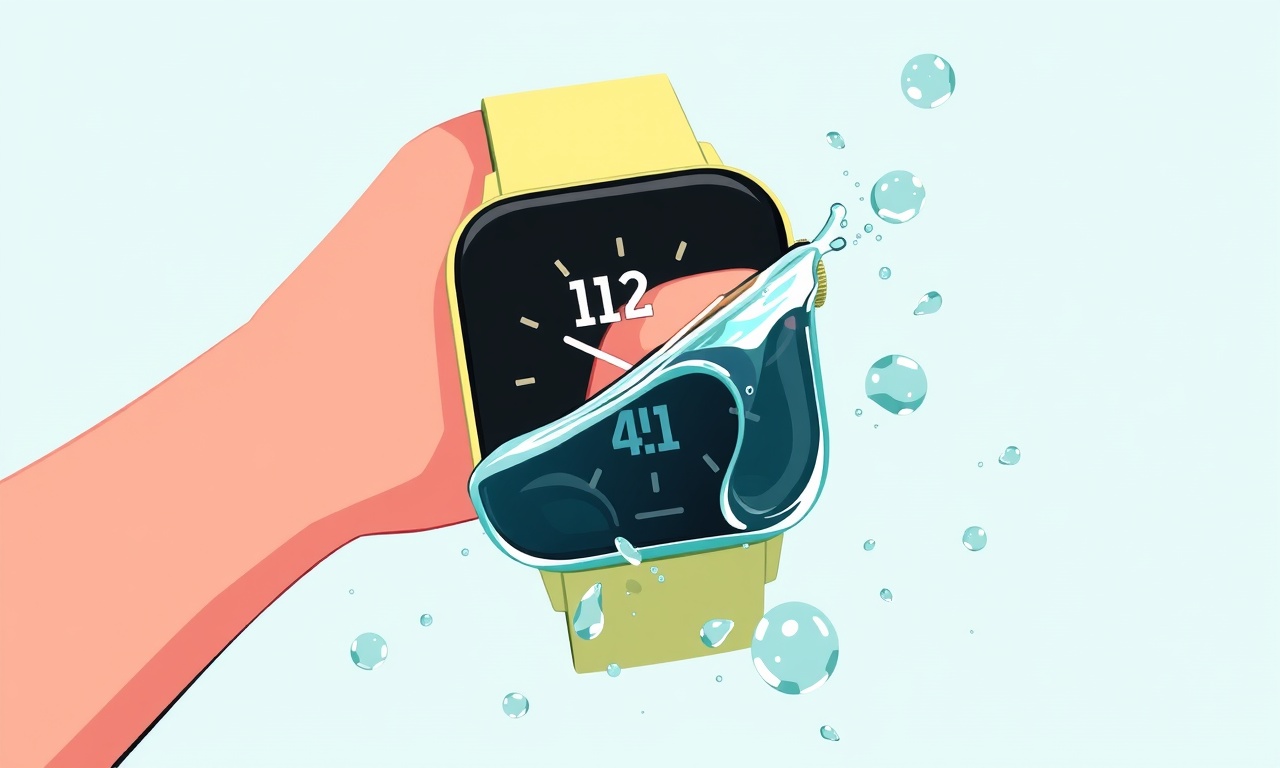
Repairing Water Damage on Fitbit Versa 4
Water Damage on the Fitbit Versa 4: A Comprehensive Repair Guide
Water damage is a common hazard for smartwatches, especially those used during workouts, showers, or swimming. The Fitbit Versa 4, while built with a rugged design, still contains delicate components that can fail when exposed to moisture. This guide walks you through the steps you can take to salvage a Versa 4 that has been exposed to water. It covers what to look for, how to safely disassemble the device, how to clean and dry it, and when professional help may be necessary.
Why Water Damage Happens
The Versa 4 is designed to be water resistant, but its rating is limited. The device has an IP rating that protects it from splashes and sweat, not from full immersion in water. If the waterproof seals are compromised—by a cracked case, a damaged charging port, or a worn gasket—water can seep inside. Even a small amount of liquid can corrode the internal circuitry, short‑circuit the battery, or cause the display to flicker.
When a smartwatch is exposed to water, the following can happen:
- Electrolytic corrosion of metal parts
- Short circuits that damage the main board
- Moisture trapped inside the display or battery compartment
- Loss of sensor accuracy because moisture interferes with magnetic fields
Recognizing these signs early can prevent irreversible damage.
Recognizing Water Damage
Before you open the device, look for tell‑tale indicators:
- Display anomalies: Blinking pixels, a grayish tint, or sudden dimming
- Charging issues: The watch fails to charge, or the indicator light stays lit
- Unresponsive buttons: Physical buttons or the touchscreen might not register input
- Unusual smells: A faint, metallic odor can signal corrosion
- Unplanned resets: The watch restarts on its own or shows error screens
If you see any of these symptoms, consider performing a quick power cycle to see if the problem is transient. If the issue persists, proceed with the detailed steps below.
Immediate Actions to Minimize Damage
When water has entered the Versa 4, the first thing to do is to stop further moisture ingress and begin the drying process as quickly as possible.
-
Power Off
Turn the watch off immediately. If it is already off, do not attempt to turn it on until you are sure it is dry. -
Remove Accessories
Detach any bands, charging cables, or cases. These may harbor moisture or interfere with the drying process. -
Dry the Exterior
Use a dry, lint‑free cloth to wipe the surface. Avoid pressing hard, as this can push moisture deeper into seams. -
Avoid Heat
Do not use a hair dryer or oven to speed drying; high heat can warp plastic components or damage the battery. -
Use Desiccants
Place the watch in a sealed container with silica gel packets or uncooked rice for 24–48 hours. This absorbs residual moisture without direct contact that could damage the screen.
Disassembly: Removing the Battery and Core Components
The Versa 4’s water‑resistant design is partly due to a sealed battery compartment. To access internal components, you need to carefully remove the back cover and battery. This section explains how to do it safely.
Tools You Will Need
- Small Phillips‑head screwdriver
- Flathead screwdriver or plastic pry tool
- Tweezers
- Clean, flat work surface
- Anti‑static wrist strap (recommended)
Step 1 – Open the Case
-
Locate the Screws
On the back of the watch, there are two small Phillips screws. Remove them using the appropriate screwdriver. -
Pry the Back Cover
Insert a flathead screwdriver or a plastic pry tool into the seam where the cover meets the case. Gently twist to release the clip that holds the cover. Avoid using excessive force; the clip is delicate and can break. -
Remove the Cover
Once loosened, lift the cover away from the case. Set it aside on a clean surface.
Step 2 – Detach the Battery
-
Locate the Battery Connector
Inside the case, the battery sits on a small circuit board. It is connected via a plastic connector. -
Disconnect the Battery
Use tweezers or a plastic tool to gently lift the connector. Avoid pulling directly on the battery cable, as it can snap. -
Remove the Battery
The battery is held in place by a small plastic clamp. Release the clamp and lift the battery out carefully. -
Inspect for Corrosion
Look for darkened areas or any residue that may indicate electrolyte leakage. If the battery is damaged, replace it before reassembly.
Cleaning the Internal Components
Once you have access to the main board and other components, proceed to clean them.
Materials for Cleaning
- Isopropyl alcohol (90 % or higher)
- Soft, lint‑free microfiber cloth
- Cotton swabs
- Small brush (e.g., a clean toothbrush)
Step 1 – Surface Cleaning
-
Apply Alcohol to the Cloth
Lightly dampen a microfiber cloth with isopropyl alcohol. Ensure it is not dripping wet. -
Wipe the Board
Gently wipe the exposed circuit board and surrounding areas. Do not touch the display glass. -
Use a Brush for Tight Spaces
For connectors and corners, use a small brush to remove any debris.
Step 2 – Replacing Corroded Parts
If you see any corroded or discolored components, you may need to replace them. Consult a parts list from a reputable supplier. Replace only if you are confident in the compatibility.
Step 3 – Drying the Components
-
Let Them Air‑Dry
Place the board on a clean tray and let it dry for at least 2 hours. Avoid blowing air directly onto the board, as this can spread moisture. -
Check for Residual Dampness
Use a light, dry cloth to confirm that the board feels dry. If it still feels damp, repeat the cleaning steps.
Reassembly and Testing
After cleaning and drying, it’s time to put the watch back together and see if it powers on.
Step 1 – Reinstall the Battery
-
Align the Battery
Place the battery back on the board, ensuring it sits flush and is correctly oriented. -
Reconnect the Connector
Attach the plastic connector, making sure it clicks into place. -
Secure the Battery
Replace the plastic clamp to hold the battery firmly.
Step 2 – Replace the Back Cover
-
Align the Cover
Slide the back cover back onto the case, aligning the clips. -
Reinstate the Screws
Tighten the two Phillips screws you removed earlier. Do not overtighten, which could damage the plastic.
Step 3 – Power On
-
Turn On the Watch
Press the power button until the screen lights up. -
Check Functionality
Verify that the display is clear, the touch interface works, and the watch can connect to Bluetooth. -
Run Diagnostics
If the device has a built‑in diagnostic mode, run it to confirm all internal components are functioning.
When Professional Repair Is Needed
If after following the steps above the Versa 4 still does not work correctly, or if you encounter any of the following, it may be time to seek professional help:
- Battery Damage: Visible corrosion or leakage requires a new battery.
- Display Issues: The screen remains dim or shows abnormal patterns.
- Circuit Damage: The device fails to boot or shows persistent error messages.
- Water Seepage in Seals: The silicone gasket around the charging port is compromised.
Professional technicians have specialized equipment to safely disassemble, inspect, and replace damaged components. Many services also offer repair guarantees and can replace the watch if it is beyond salvage.
Preventive Measures to Avoid Future Water Damage
While some water exposure is unavoidable, several steps can dramatically reduce the risk.
1. Use a Waterproof Case or Cover
A dedicated waterproof case can provide an additional barrier, especially if you swim regularly. Make sure it’s rated for depth and pressure.
2. Inspect Seals Regularly
Check the silicone gasket around the charging port and the seam between the back cover and the case for cracks or wear.
3. Keep the Band Clean
If you use a silicone band, wash it regularly. Bacteria and sweat can create a moist environment that encourages corrosion.
4. Avoid Using Heat for Drying
When the watch gets wet, rely on air drying and desiccants. Avoid hair dryers or ovens, as excessive heat can warp plastic parts.
5. Perform Regular Software Updates
Fitbit releases firmware updates that sometimes include improvements to power management and sensor calibration. Keeping your device updated reduces the likelihood of software glitches that could mask hardware problems.
Final Thoughts
Water damage can be intimidating, but with a methodical approach you can often restore your Fitbit Versa 4 to working condition. By acting quickly, carefully disassembling the device, cleaning and drying its components, and reassembling with precision, many users have successfully rescued their watches after accidental exposure to moisture. If the damage proves extensive, professional repair is the safest route. Regardless of the outcome, implementing preventive measures will help protect your smartwatch from future water-related mishaps.
Discussion (8)
Join the Discussion
Your comment has been submitted for moderation.
Random Posts

Reassessing the Audio Jack Dropout on LG Velvet 2
Explore why the LG Velvet 2's 3.5mm jack glitches, what triggers audio dropouts, user fixes, and LG's stance: essential insight for current and future Android phones.
1 year ago

Philips HP700 Fan Stalls Quietly Even At Low Speed Why This Happens And What To Do
Discover why your Philips HP700 quietly stalls at low speed, spot early signs, and fix the issue to keep steady airflow.
2 weeks ago

How to Stop Sharp LC-40M from Producing Audio Sync Issues While Gaming
Fix your Sharp LC-40M so game audio stays in sync. Learn quick settings tweaks, cable checks, and audio-output fixes that keep sound matching action for a flawless gaming experience.
6 months ago

Solve Arlo Pro 4 Wireless Connection Problems
Discover quick fixes for offline Arlo Pro 4 cameras. Check power, Wi, Fi, firmware, reset steps, and more get your live feed back up fast.
4 months ago

Panasonic D45 Dryer Timer Skips Final Drying Cycle
Discover why your Panasonic D45 dryer skips its final cycle, learn the symptoms, root causes, and easy fixes to keep clothes dry, save energy, and avoid extra runs.
5 months ago
Latest Posts

Fixing the Eufy RoboVac 15C Battery Drain Post Firmware Update
Fix the Eufy RoboVac 15C battery drain after firmware update with our quick guide: understand the changes, identify the cause, and follow step by step fixes to restore full runtime.
5 days ago

Solve Reolink Argus 3 Battery Drain When Using PIR Motion Sensor
Learn why the Argus 3 battery drains fast with the PIR sensor on and follow simple steps to fix it, extend runtime, and keep your camera ready without sacrificing motion detection.
5 days ago

Resolving Sound Distortion on Beats Studio3 Wireless Headphones
Learn how to pinpoint and fix common distortion in Beats Studio3 headphones from source issues to Bluetooth glitches so you can enjoy clear audio again.
6 days ago