Repairing Valve Index Headset Cable Strain Damage
Understanding the Problem
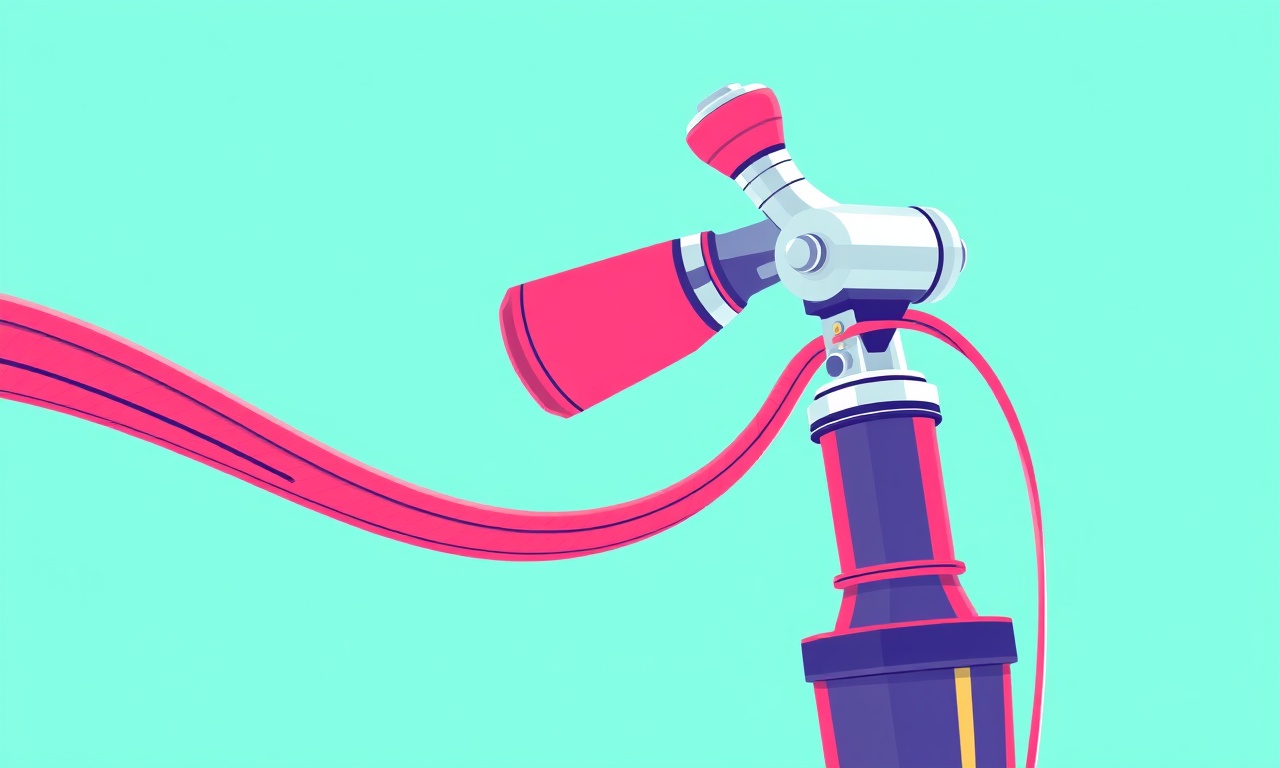
The Valve Index headset is known for its crisp visuals, wide field of view, and precise tracking. One of the most common points of failure, however, is the cable that runs from the headset to the external Link Box. Repeated bending, accidental tugs, or simple wear over time can cause the internal wires to fracture, resulting in intermittent video loss, static, or complete signal failure.
Identifying the exact nature of the damage before you start tearing the headset apart saves time and reduces the risk of further complications. Typical signs of cable strain damage include:
- Flickering or loss of image when you move your head sharply
- A buzzing sound coming from the headset when the cable is flexed
- The headset working fine when the cable is laid flat but cutting out when bent at a specific spot
- Visible cracks, kinks, or exposed copper on the external jacket
If you notice any of these symptoms, it is likely that the internal conductors have been compromised. The good news is that the Valve Index cable is not a proprietary, sealed component. With the right tools and a steady hand, you can replace or reinforce the damaged section yourself.
Gathering the Tools
Before you begin, assemble the following items. Having everything at hand prevents interruptions and reduces the chance of accidental drops or static discharge.
- Small Phillips head screwdriver (size #00 or #0)
- Precision torx screwdriver (T6) for the headset’s internal screws
- Needle‑nose pliers
- Wire cutters/strippers (preferably with a fine tip)
- Heat‑shrink tubing (1 mm and 2 mm diameter)
- Soldering iron with a fine tip (15‑30 W) and lead‑free solder
- Desoldering braid or a small suction pump
- Isopropyl alcohol (90 %+) and a lint‑free cloth for cleaning
- Protective anti‑static wrist strap (optional but recommended)
- Replacement cable or a compatible spare (Valve sells a replacement cable, or you can use a high‑quality USB‑C to HDMI/DisplayPort cable that matches the Index’s pinout)
- Small pieces of electrical tape for temporary fixes
Having a clean, well‑lit workspace with a small mat or tray helps keep screws and tiny components from rolling away.
Safety First
Working with electronics always carries a risk of electric shock, component damage, or personal injury. Follow these precautions:
- Disconnect the headset from power and the Link Box before opening anything.
- Remove any batteries from controllers or accessories that may be nearby.
- Work on a non‑conductive surface.
- If you have an anti‑static wrist strap, attach it to a grounded metal object.
- Keep the soldering iron on a heat‑resistant pad and never touch the tip while it is hot.
Taking these steps will protect both you and the delicate VR hardware.
Disassembling the Headset
The Valve Index headset is composed of several modular pieces: the front visor, the strap, and the interior electronics housing. Most cable strain occurs at the point where the cable enters the visor shell, so you will focus on opening that section.
-
Remove the facial foam and visor – Gently pull the foam pad away from the headset. The visor is attached with four small Phillips screws located near the front corners. Unscrew them and set the screws aside in a safe container.
-
Detach the strap – The strap is secured by two quick‑release levers on the sides. Press the levers to release the strap and set it aside.
-
Access the internal cable entry – With the visor removed, you will see a rubber grommet where the cable passes through. Carefully cut away any adhesive tape surrounding the grommet using a precision knife.
-
Free the cable clamp – Inside the visor, a small metal clamp holds the cable in place. Use a torx T6 screwdriver to loosen the clamp screw. Once loosened, you can gently pull the cable out of the headset shell.
Take this moment to inspect the cable for obvious external damage. If the outer jacket is cracked or the strain point is visibly bulging, you will need to replace the entire cable. If the damage is internal and the outer jacket looks intact, you can attempt a repair on the existing cable.
Preparing the Repair Area
Assuming you are repairing the existing cable, you will need to expose the damaged section.
-
Locate the fault – With the cable free, flex it gently while observing the headset’s display (you can reconnect it temporarily to a monitor). The spot where the image cuts out is the damaged zone.
-
Mark the area – Use a small piece of masking tape to mark both ends of the faulty segment, leaving about 1 cm of healthy conductor on each side.
-
Strip the outer jacket – Using the wire cutters, carefully cut a 2‑cm length of the outer jacket on each side of the marked area. Be careful not to nick the inner insulation.
-
Expose the inner wires – Each cable inside the Index’s harness contains multiple twisted pairs for video, audio, and power. Using the wire strippers, remove about 5 mm of the inner insulation from each pair in the marked region. You should now see the copper conductors.
-
Identify the twisted pairs – The Index cable uses a specific pinout. Commonly, the pairs are color‑coded: red/white for power, green/blue for HDMI signal, and black/gray for audio. If you are uncertain, consult the official Valve cable wiring diagram (available on the Valve support site).
Repair Options
There are two main ways to address the damage: a splice repair or a full cable replacement. The choice depends on the extent of the damage and the tools you have.
Splice Repair
A splice repair is suitable when only a short section of the conductors is broken. This method involves soldering the damaged wires together and reinforcing the joint with heat‑shrink tubing.
-
Trim the damaged ends – Using the wire cutters, cut away the frayed or broken copper from each side of the fault. Aim for clean, straight ends.
-
Twist the matching wires – Align the corresponding wires (e.g., red to red, green to green) and twist them together tightly.
-
Apply solder – Heat the soldering iron, then touch the tip to the twisted joint while feeding a small amount of solder onto the connection. The solder should flow smoothly, covering the joint without creating a bulky blob.
-
Insulate each pair – Cut a short piece of heat‑shrink tubing (1 mm) for each individual pair. Slide the tubing over the joint before soldering, then slide it back into place after the solder cools. Use a heat gun or the soldering iron’s hot tip to shrink the tubing snugly.
-
Bundle the repaired section – Once all pairs are spliced and insulated, slide a larger piece of heat‑shrink tubing (2 mm) over the entire repaired area. Center it and apply heat to seal the bundle, providing extra strain relief.
-
Re‑apply the outer jacket – If you removed a length of the outer jacket, you can use a small piece of flexible tubing or electrical tape to recreate a protective covering.
Full Cable Replacement
If the cable is heavily damaged, has multiple fault points, or you prefer a clean solution, replace the entire cable.
-
Obtain a replacement – Purchase the official Valve Index cable or a third‑party cable that matches the exact pinout and connector type.
-
Desolder the old connector – Using a desoldering braid, remove any solder that holds the original connector to the headset’s PCB. Carefully lift the connector away once the solder is cleared.
-
Prepare the new cable – Strip the ends of the new cable in the same manner as described earlier, exposing the inner conductors.
-
Solder the new connector – Align each wire with its corresponding pad on the PCB. Apply a small amount of solder to each pad, then press the wire onto it and heat until the solder flows, creating a solid joint.
-
Inspect the work – Verify that no solder bridges exist between adjacent pads. Use a magnifying glass if necessary.
-
Re‑assemble the headset – Re‑install the cable clamp, route the new cable through the rubber grommet, and secure it with the clamp screw. Replace the visor, screw in the four Phillips screws, and re‑attach the strap.
Testing the Fix
Regardless of the repair method you chose, a thorough test ensures that the headset functions correctly before you start using it for extended sessions.
-
Reconnect the headset – Plug the repaired or new cable into the Link Box and connect the Box to your PC.
-
Launch SteamVR – Observe the headset’s display while the system runs its calibration routine.
-
Perform a mobility test – Gently move the headset around, paying special attention to the area where the cable was repaired. Look for any flickering, loss of signal, or audio dropouts.
-
Check audio – Listen for clear sound from the built‑in speakers. If you notice static or missing channels, double‑check your audio wire connections.
-
Run a stress test – Play a short VR title that involves rapid head movements (e.g., a room‑scale experience). Monitor for any intermittent issues over a 5‑minute period.
If the headset performs flawlessly, you have successfully restored it. If problems persist, re‑examine each solder joint and ensure that the heat‑shrink tubing fully covers the exposed conductors. In some cases, a subtle hairline fracture may still be present; replacing the entire cable is the safest fallback.
Preventing Future Damage
Cable strain is often a result of how the headset is stored or handled. Adopt these habits to extend the life of your Valve Index.
- Use a cable guide – Attach a small Velcro strap or a cable management clip near the headset’s base. This keeps the cable from dangling and reduces bending at the entry point.
- Avoid sharp bends – When putting the headset on or taking it off, guide the cable in a smooth arc rather than pulling it sharply.
- Store the headset upright – When not in use, place the headset on a stand that supports the visor and keeps the cable hanging loosely, away from edges.
- Consider a protective sleeve – A flexible neoprene sleeve that slides over the cable can absorb minor impacts and reduce wear.
- Inspect regularly – Every few months, gently flex the cable while watching for any visual anomalies. Early detection prevents catastrophic failure.
By treating the cable with care, you can avoid most strain‑related repairs.
When to Seek Professional Help
While most hobbyists can manage a splice or full cable replacement, certain situations warrant professional assistance.
- The headset is still under warranty – Opening the device may void the warranty. Contact Valve Support for a replacement or authorized repair.
- Damage to the PCB – If you notice burnt spots, cracked solder joints, or other signs of internal damage beyond the cable, a trained technician should handle the repair.
- Lack of soldering experience – Poor solder joints can cause intermittent issues that are harder to diagnose later. If you are uncomfortable with fine‑pitch soldering, it is safer to let a professional do it.
Seeking help when needed saves time, prevents further damage, and ensures that your VR experience remains uninterrupted.
Conclusion
Cable strain damage on the Valve Index headset is a common, yet solvable problem. By understanding the symptoms, gathering the right tools, and following a systematic repair process, you can restore full functionality without expensive replacements. Whether you choose a careful splice repair or a complete cable swap, thorough testing and preventive habits will keep your headset performing at its best for years to come.
Remember that patience, attention to detail, and a clean workspace are the cornerstones of any successful electronics repair. With these principles in mind, you can enjoy immersive VR experiences without the frustration of a faulty cable.
Discussion (5)
Join the Discussion
Your comment has been submitted for moderation.
Random Posts

Rebooting Google Nest Hub (3rd Gen) to Resolve App Sync Glitches
Stuck with delayed notifications, unresponsive tiles, or stale smart, home data? A simple reboot of your Nest Hub 3rd Gen clears cache, resets processes, and restores smooth app sync.
3 months ago

Fixing Bluetooth Signal Drops on Apple AirPods Pro
Tired of AirPods Pro disconnecting during walks or workouts? Learn why Bluetooth drops happen, how to spot them, and quick fixes - no coding required - to keep audio flowing.
11 months ago

Fixing the Duplexer Failure on a Brother MFC‑J805DW
Learn how to diagnose and replace a faulty duplexer on your Brother MFC, J805DW, restoring double, sided printing with step, by, step instructions for tech, savvy users.
10 months ago

Solving Apple iPhone 13 Pro Camera Rolling Shutter With External Lens
Stop the slanted look from rolling shutter when adding external lenses to your iPhone 13 Pro by tweaking camera settings, choosing the right lens, and using proper stabilization.
9 months ago

Restoring Bandwidth on Amazon Eero Mesh 6 Pro After a Firmware Update
After an Eero Mesh 6 Pro firmware update, bandwidth often drops. This guide explains why the change occurs and walks you through quick steps to restore full speed and a stable connection for work and play.
8 months ago
Latest Posts

Fixing the Eufy RoboVac 15C Battery Drain Post Firmware Update
Fix the Eufy RoboVac 15C battery drain after firmware update with our quick guide: understand the changes, identify the cause, and follow step by step fixes to restore full runtime.
5 days ago

Solve Reolink Argus 3 Battery Drain When Using PIR Motion Sensor
Learn why the Argus 3 battery drains fast with the PIR sensor on and follow simple steps to fix it, extend runtime, and keep your camera ready without sacrificing motion detection.
5 days ago

Resolving Sound Distortion on Beats Studio3 Wireless Headphones
Learn how to pinpoint and fix common distortion in Beats Studio3 headphones from source issues to Bluetooth glitches so you can enjoy clear audio again.
6 days ago