Whirlpool WUD120 Dryer Leaking Water Stop It Now
Introduction
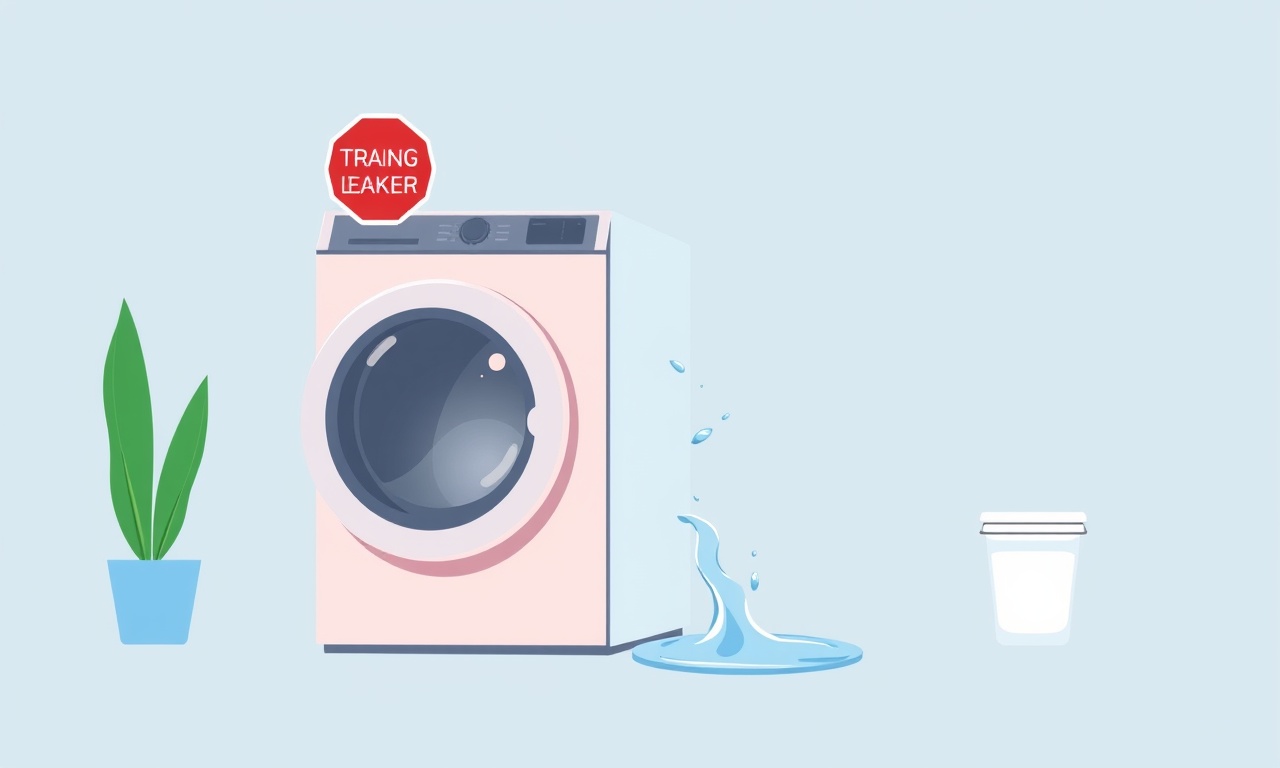
The Whirlpool WUD120 dryer is a staple in many laundry rooms. Its sleek design, efficient drying cycles, and quiet operation make it a reliable choice for families. Yet, like any mechanical appliance, it can develop issues over time. One of the most alarming problems a homeowner may face is a sudden, persistent water leak from the dryer. Water dripping onto the floor, beneath the cabinet, or from the back panel can not only damage the appliance but also create a slip hazard, attract pests, and compromise the safety of your home.
This guide will walk you through the causes of a leaking Whirlpool WUD120 dryer, show you how to diagnose the problem safely, and provide detailed, step‑by‑step instructions to stop the leak in place. By the end, you should be able to restore your dryer to dry, dry, dry condition and prevent future leaks with routine maintenance.
What Does a Leak Look Like?
Before diving into troubleshooting, it’s essential to recognize the signs that your dryer is leaking water.
- Clear, running water: Unlike lint or debris, water is usually clear or slightly cloudy.
- Location: Leaks often appear under the dryer, behind the cabinet, or along the water inlet hose.
- Timing: A leak that starts after a load or during a specific cycle is likely related to the drainage system.
- Accompanying odors: A musty smell can indicate trapped moisture.
If you notice any of these clues, do not ignore them. Even a small leak can grow into a larger problem if left unattended.
Safety First
Working with appliances involves electrical components and potentially hazardous materials. Prior to any inspection or repair, follow these safety steps:
- Unplug the dryer from the electrical outlet.
- Turn off the water supply if your dryer is a condenser model that uses water.
- Move the dryer away from the wall to give yourself space to work.
- Check for electrical hazards: Look for exposed wiring or signs of damage.
Once you have completed these precautions, you can begin troubleshooting.
Step‑by‑Step Troubleshooting
1. Inspect the Drain Hose
The most common source of leaks is a damaged or improperly connected drain hose.
- Locate the hose: It usually runs from the back of the dryer to the vent or condensate pump.
- Look for kinks or cracks: A kinked hose can block water flow and cause pooling.
- Check connections: The hose should be firmly attached to both the dryer and the vent or condensate unit.
- Replace if damaged: If you see any cracks, holes, or severe wear, replace the hose with a new one rated for dryer use.
If you have replaced the hose and the leak persists, move on to the next step.
2. Examine the Lint Filter and Screen
Blocked lint filters can cause water to back up into the dryer housing.
- Remove the lint filter and any lint trap components.
- Clean thoroughly: Wash with warm, soapy water and dry completely before re‑installing.
- Check the filter screen: If it is damaged or warped, replace it.
After cleaning, run a short cycle to see if the leak stops.
3. Check the Condensate Drain (Condenser Dryers Only)
If your WUD120 model is a condenser dryer, it uses a condensate system that can clog.
- Locate the condensate drain: This is typically a small pipe or tube that channels water to a sink or drain.
- Clear any blockage: Use a flexible brush or a narrow tube to flush out lint or debris.
- Test the drainage: After clearing, run a cycle to verify that water exits cleanly.
4. Inspect the Water Inlet Valve
For models that use a water supply (rare but possible), a faulty inlet valve can leak.
- Locate the valve: It’s usually behind the dryer or near the water supply line.
- Look for corrosion or damage: A corroded valve may develop cracks.
- Test the valve: Using a multimeter, check for continuity and correct pressure.
- Replace if necessary: A faulty valve should be replaced by a qualified technician.
5. Evaluate the Dryer’s Drainage System
Some Whirlpool dryers use a drainage system that relies on gravity.
- Verify the dryer’s level: Place a level on the appliance to confirm it’s sitting evenly. A tilted dryer can cause water to accumulate in unintended areas.
- Check the floor drain: If the dryer sits on a floor drain, ensure the drain is clear.
- Inspect the back panel: A loose or damaged back panel can let water seep through. Tighten screws or replace the panel if damaged.
6. Look for Internal Seals or Gaskets
Internal seals keep water from escaping the dryer chamber.
- Open the dryer’s rear panel: You’ll see a series of gaskets and seals.
- Check for cracks or tears: Even a small break can allow water to leak out.
- Replace damaged gaskets: Gaskets are inexpensive and can be bought from Whirlpool or a hardware store.
7. Test the Dryer Again
After addressing each potential cause, run a test cycle with a small load. Observe:
- Where water is coming from: This helps pinpoint any remaining issues.
- Whether the leak stops: If the leak stops, you’ve found the culprit.
If the dryer still leaks, it may be a deeper electrical or mechanical problem that requires professional help.
Fixing Common Causes
Replacing a Damaged Drain Hose
- Cut the old hose with a pipe cutter or a sharp knife.
- Measure and cut the new hose to the same length.
- Attach the new hose to the dryer with the provided clamp or connector.
- Secure the other end to the vent or condensate drain with a hose clamp.
- Test for leaks by running a cycle.
Cleaning and Re‑installing the Lint Filter
- Remove the filter from its housing.
- Rinse under warm water; avoid soap that can leave residue.
- Dry completely with a clean towel.
- Re‑install the filter firmly in its slot.
Clearing the Condensate Drain
- Insert a narrow, flexible brush into the drain line.
- Work the brush back and forth to dislodge lint.
- Flush with water using a small cup or a hose to ensure clear flow.
Replacing a Faulty Water Inlet Valve
- Turn off the water supply and unplug the dryer.
- Disconnect the inlet valve from the water line.
- Remove the valve with a wrench.
- Install a new valve following the manufacturer’s instructions.
- Re‑connect the water line and test for leaks.
Tightening or Replacing a Loose Back Panel
- Remove any screws holding the back panel.
- Inspect the screws: Replace any that are stripped or rusted.
- Re‑attach the panel and ensure it sits flush against the dryer body.
Prevention Tips
Maintaining your dryer can keep it running efficiently and stop leaks before they happen.
- Check the lint filter after each load: A clogged filter is a frequent leak source.
- Clean the vent and hose monthly: Remove lint buildup to keep water flowing properly.
- Inspect hoses and connections quarterly: Look for wear, kinks, or loose fittings.
- Keep the dryer level: Use a spirit level or a built‑in sensor if available.
- Replace gaskets every few years: They can dry out and crack over time.
A little routine care goes a long way toward preventing water leaks and prolonging your dryer’s lifespan.
When to Call a Professional
If you have tried all the troubleshooting steps above and the leak continues, it’s time to contact a qualified appliance repair technician. Common scenarios that warrant professional help include:
- Electrical issues: A dryer's motor or electronic control board may be failing.
- Complex plumbing: Problems with the condensate pump or water inlet require specialized tools.
- Major component replacement: Items like the water inlet valve or the entire drainage system may need professional installation.
Professional technicians can diagnose hidden problems, replace parts safely, and ensure your dryer operates within manufacturer specifications.
Frequently Asked Questions
Why is my Whirlpool dryer leaking water even though it’s not a condenser model?
Even conventional dryers can develop leaks if the drain hose is kinked, the lint filter is clogged, or the water inlet valve is faulty. Follow the troubleshooting steps to identify the root cause.
Can I fix the leak myself if I’m not comfortable with plumbing?
If the leak appears to stem from the drain hose or lint filter, most homeowners can fix these issues safely. For internal components like the water inlet valve, it’s best to seek professional help.
Will a leaking dryer affect my home’s insurance coverage?
Repeated leaks that damage flooring or cause mold can affect coverage claims. Promptly addressing the leak and documenting repairs may help protect your policy.
How long does a Whirlpool WUD120 dryer usually last?
With proper maintenance, this model can last 10–15 years. However, frequent leaks or neglect can shorten its lifespan.
Is it safe to run a cycle while the dryer is leaking?
No. Running a cycle can worsen the leak, create a safety hazard, and damage the appliance further. Always stop the dryer before performing repairs.
Final Thoughts
A leaking Whirlpool WUD120 dryer can be a source of frustration and risk, but most leaks are preventable or fixable with a methodical approach. By understanding the common causes—damaged hoses, clogged filters, faulty valves, and misaligned panels—and applying the step‑by‑step solutions outlined above, you can bring your dryer back to dry, dry, dry performance quickly.
Remember, safety is paramount. Always unplug the appliance, check for electrical hazards, and consult a professional when you encounter problems beyond your skill level. With regular maintenance and attentive care, your dryer will continue to serve your household reliably for years to come.
Discussion (5)
Join the Discussion
Your comment has been submitted for moderation.
Random Posts

Reassessing the Audio Jack Dropout on LG Velvet 2
Explore why the LG Velvet 2's 3.5mm jack glitches, what triggers audio dropouts, user fixes, and LG's stance: essential insight for current and future Android phones.
1 year ago

Philips HP700 Fan Stalls Quietly Even At Low Speed Why This Happens And What To Do
Discover why your Philips HP700 quietly stalls at low speed, spot early signs, and fix the issue to keep steady airflow.
2 weeks ago

How to Stop Sharp LC-40M from Producing Audio Sync Issues While Gaming
Fix your Sharp LC-40M so game audio stays in sync. Learn quick settings tweaks, cable checks, and audio-output fixes that keep sound matching action for a flawless gaming experience.
6 months ago

Solve Arlo Pro 4 Wireless Connection Problems
Discover quick fixes for offline Arlo Pro 4 cameras. Check power, Wi, Fi, firmware, reset steps, and more get your live feed back up fast.
4 months ago

Panasonic D45 Dryer Timer Skips Final Drying Cycle
Discover why your Panasonic D45 dryer skips its final cycle, learn the symptoms, root causes, and easy fixes to keep clothes dry, save energy, and avoid extra runs.
5 months ago
Latest Posts

Fixing the Eufy RoboVac 15C Battery Drain Post Firmware Update
Fix the Eufy RoboVac 15C battery drain after firmware update with our quick guide: understand the changes, identify the cause, and follow step by step fixes to restore full runtime.
5 days ago

Solve Reolink Argus 3 Battery Drain When Using PIR Motion Sensor
Learn why the Argus 3 battery drains fast with the PIR sensor on and follow simple steps to fix it, extend runtime, and keep your camera ready without sacrificing motion detection.
5 days ago

Resolving Sound Distortion on Beats Studio3 Wireless Headphones
Learn how to pinpoint and fix common distortion in Beats Studio3 headphones from source issues to Bluetooth glitches so you can enjoy clear audio again.
6 days ago